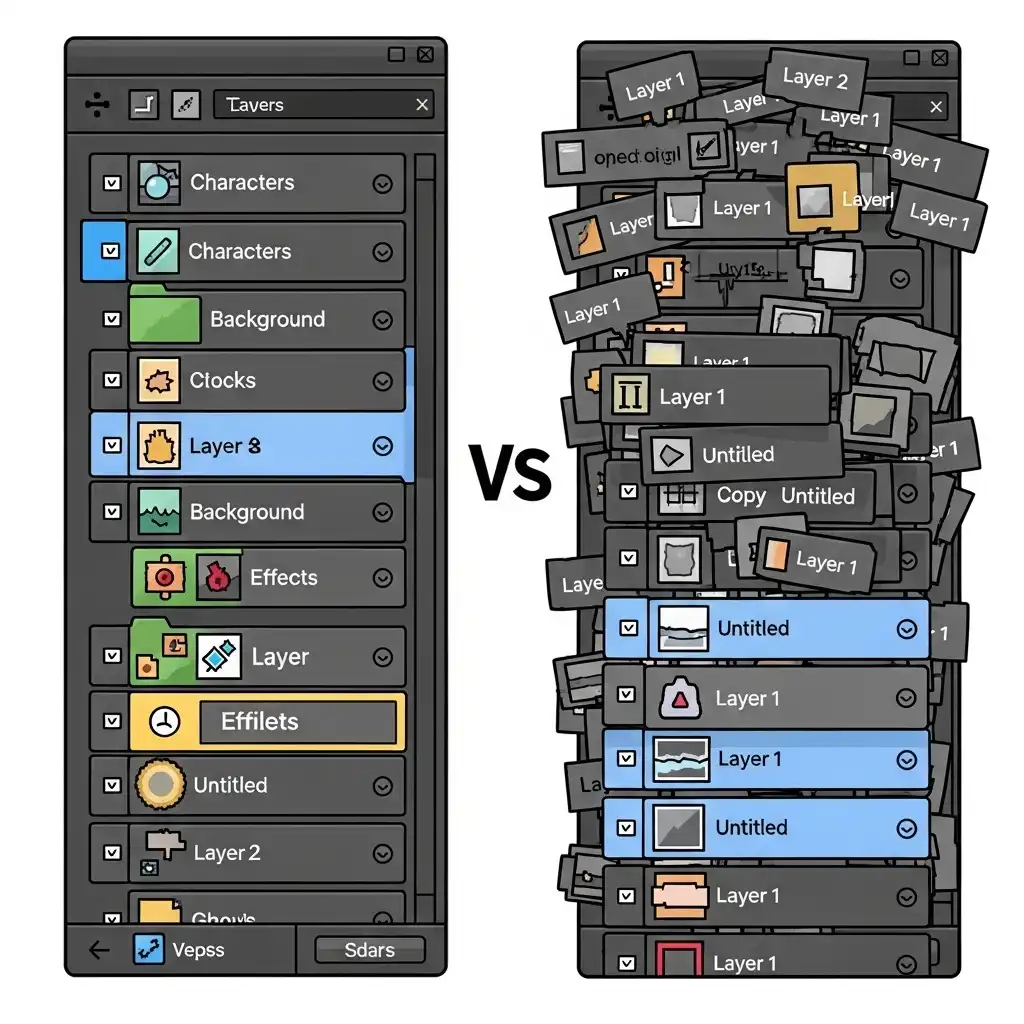
Open an amateur's layer panel and you will meet the same old residents: "Layer 1," "Layer 1 copy," "Layer 1 copy 7," and the mysterious "Mask 3." Open a professional's and you will read a table of contents: "WB Fix," "Curves – Contrast," "Dodge – Face," "Grain 2%." The difference is not tidiness for its own sake — it is infrastructure. An organized layer stack turns revision from archaeology into navigation, and turns experimentation from risk into routine.
In this guide you will learn why layer organization matters more than any single technique, the naming conventions that save hours, how to group and color-code layers into a structure that scales, a step-by-step beginner workflow, and the revision test that proves why this discipline pays off days later — all practicable in our Photo Editor.
Why Layer Organization Matters (It's Infrastructure, Not Vanity)
A messy layer stack creates friction at exactly the moments creativity needs flow: mid-edit, when hunting for the right layer breaks concentration; and days later, when a client asks for a small change and you cannot remember which of nine unnamed layers holds the color grade. Worse, mess discourages experimentation — if every new layer deepens the chaos, you stop adding layers, and stopping layers means stopping non-destructive editing itself.
An organized stack does the opposite: it invites boldness, because every decision is findable, adjustable, and removable. Think of organization as the shelving system of a workshop: tools do not become better because they are labeled, but the craftsman does — because nothing is ever lost, and everything is ready when inspiration arrives.
The Naming Convention That Saves Hours
The rule is simple and absolute: rename every layer at the moment of creation, never at the end — because the end never comes. Good names state purpose and target: "WB Fix," "Exposure plus," "Curves – Contrast," "Dodge – Face," "Burn – Background," "Heal – Skin," "Grain 2%." Bad names state nothing: "Layer 4," "Adjustment 2," "Mask copy."
A useful pattern is function then target: what the layer does, then where it applies. For adjustment stacks, include intensity when relevant, like "Vibrance 30%," because opacity values are the first thing future-you forgets. This habit costs two seconds per layer and saves minutes per revision — and minutes per revision, across a portfolio and a career, become days. Name layers as if someone else will inherit the file; someday, that someone will be you.
How to Group Layers into Folders (Structure That Scales)
Once layers carry names, folders give them architecture. Group by function, not by chronology: a Foundation folder for white balance and exposure; a Color folder for grading, HSL, and split-toning layers; a Retouch folder for healing and dodge and burn; a Finish folder for sharpening, grain, and vignette. Order the folders in workflow sequence, consistently, so the stack reads like a recipe.
Keep nesting shallow: one level of folders inside folders is plenty, because deeper hierarchies hide layers instead of organizing them. Collapse folders you are not working in to keep the panel scannable, and expand only the group under your brush. A well-grouped stack answers any question — where is the contrast decision? — with a single glance.
Color-Coding and Visual Hygiene
Names tell you what; colors tell you where. Assign each functional group a consistent color — foundation green, color blue, retouch red, finish yellow, or any personal system — and the layer panel becomes a map readable at a glance: a red layer sitting inside the blue group instantly reveals a misfiled decision.
Visual hygiene extends beyond color: hide layers you are testing but not using, delete layers that are truly dead such as empty masks and abandoned experiments, and keep opacity and mask indicators visible so no layer's state is a mystery. The goal is a panel where every element declares its identity, location, and status without a single click of investigation.
How to Organize Layers Step by Step (Beginner Workflow)
- Name every layer the moment you create it — purpose and target, two seconds, no exceptions.
- Create your functional folders early: Foundation, Color, Retouch, Finish.
- Drop each new layer into its folder as you go, because grouping at the end never happens.
- Color-code the groups once and keep the system forever.
- Order folders in workflow sequence so the stack reads like your process.
- At session's end, run a hygiene pass: hide testing layers, delete dead ones, and confirm every name still matches what the layer actually does.
- Save with the structure intact and run the reopen test: could you find any single decision within five seconds? Practice the whole system in our Photo Editor, whose layer stack supports naming, grouping, and full non-destructive revision.
The Revision Test: Why Organization Pays Off Days Later
The true exam of layer organization arrives after the edit is finished. A client emails: can the background be a little darker? A month later, you want to reprint an old image with warmer tones. With an organized stack, both requests take minutes: open the file, expand the right folder, adjust the named layer, export.
With a messy stack, the same requests become archaeology — clicking through unnamed layers, toggling visibility, guessing — which often ends in the most expensive outcome of all: redoing the edit from scratch. Organization is what makes non-destructive editing actually reversible in practice, not just in theory. And if you ever collaborate or hand off files, an organized stack is professional courtesy made visible: it says your work can survive without your presence.
Common Layer Organization Mistakes (and How to Fix Them)
- Planning to name layers at the end — the end never comes; name at creation.
- Grouping by chronology, like "Monday's layers," instead of function, so related decisions scatter across the stack.
- Keeping dozens of dead layers just in case, bloating the file and burying live decisions under ghosts — delete what is truly dead, hide what is uncertain.
- Over-nesting folders into labyrinths where layers hide three levels deep.
- Using inconsistent color systems that change per project, destroying the at-a-glance map.
- And skipping organization on quick edits — habits are built exactly there, and the quick edit that becomes a client job inherits whatever discipline you practiced.
Frequently Asked Questions
How should I name layers in photo editing?
How many layer groups should I use?
Should I delete unused layers or keep them?
Does layer organization affect file size or performance?
Can I organize layers in a free online photo editor?
The Takeaway
Layer organization is the quiet discipline that makes every other discipline usable: names make decisions findable, folders make structure readable, colors make misfiles visible, and hygiene keeps the stack honest. Rename at creation, group by function, order by workflow, color-code consistently, and run the reopen test before every save. Build your stack like a workshop in our Photo Editor — your files never leave your browser.
Key Takeaways:
- Organization is infrastructure, not vanity.
- Naming at the end never happens; name at creation.
- Function beats chronology in grouping layers.
- Dead layers bury live ones; delete or hide them.
- The revision test — find any decision in five seconds — is the only grade that matters.